Fitting Guide
Tools: a tape measure, the correct hand screwdriver, a small spirit level, a door wedge and a soft cloth.
Before you start
This standard square letterplate has a 314 × 70 mm face and 270 mm fixing centres. Its side-view drawing shows a 42–70 mm assembly range. Measure the actual door and opening, then compare the overall/fixing drawing and the routing profile below. Use the panel model’s own drawing for thinner panels.
Fit and check
- Hold the door open with a wedge. Support the outside letterplate while you undo the existing inside fixing screws, then remove both halves without damaging the edge of the opening.
- Measure the door thickness, existing routed opening and fixing centres. Dry-fit the new halves and check that the sleeves and fixing positions meet without force. The face size is the cover size, not the cut-out size.
- Fit the outside and inside halves in the orientation shown in the supplied instructions. Start both fixing screws by hand and tighten evenly, keeping the faces level and flat against the door. Use the specified fixings and adjustment method for this model.
- Open each flap fully and check that it returns freely, that nothing catches inside the opening and that post passes through without snagging. Recheck the fixings after the first operation.
If the opening needs enlarging or new holes are required, use the exact manufacturer template and the door maker’s permitted preparation. Do not cut a composite, reinforced, glazed or fire-rated door from the cover dimensions alone.
Drawings for this model
The overall drawing shows the front, side and fixing arrangement; the routing drawing shows the opening profile and corner radii. Open either image to inspect it at full size.
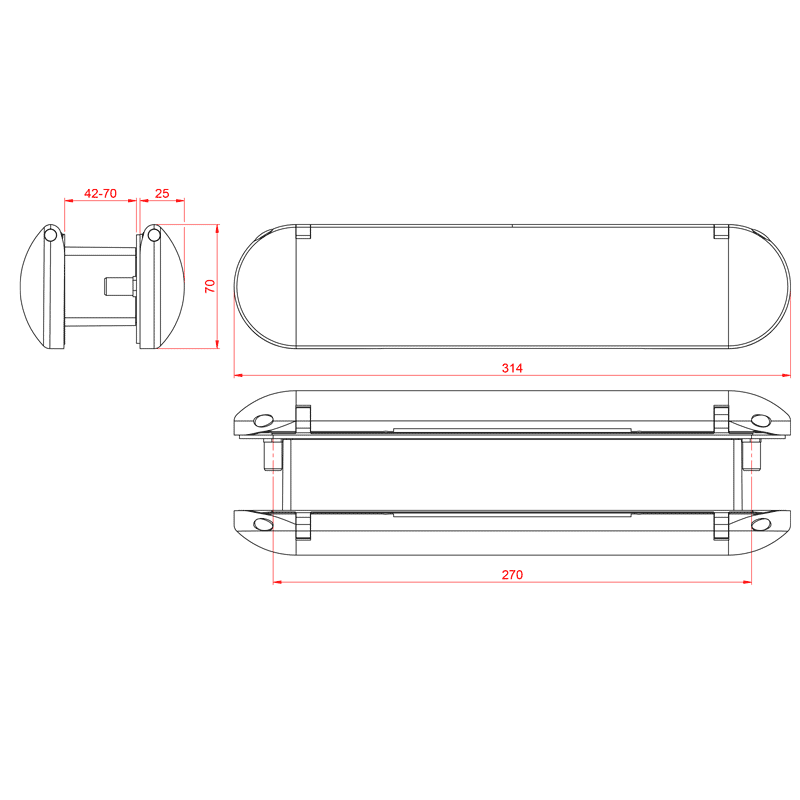
Overall and fixing dimensions
|
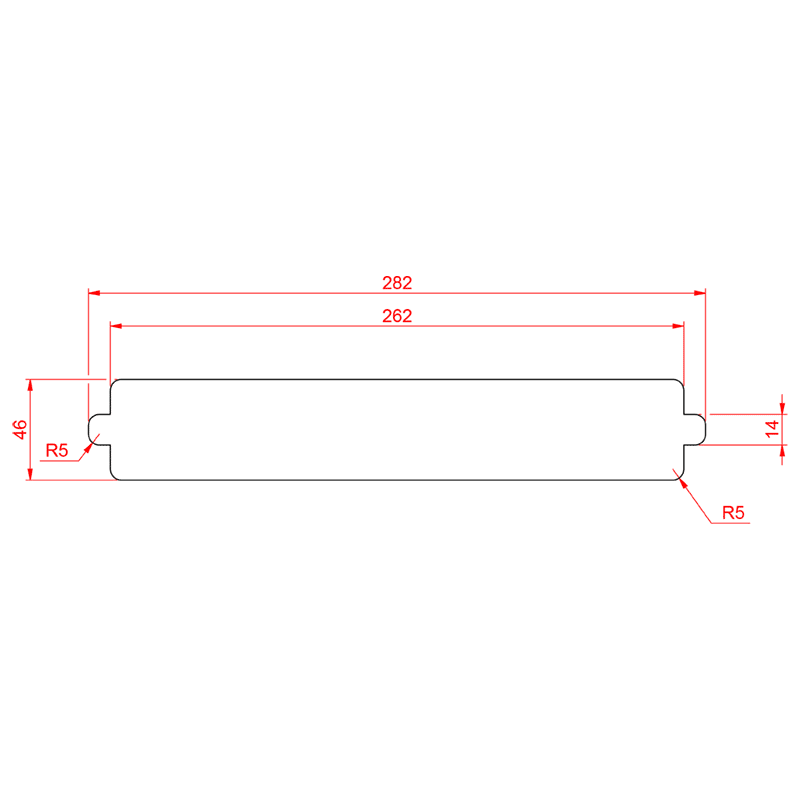
Routed opening profile
|


